A VOCOM Tough – new or recently reset (for information, see Reset configuration).
A wireless USB adapter.
A computer with VOCOM driver version 4.5.0 or newer installed.
Overview
Setting up VOCOM Tough for Wi-Fi access point mode means that the VOCOM device creates a wireless network that your computer connects to. Read more about access point mode here.
Disconnect the ECTA-12/USB cable from the computer before using VOCOM Tough in Access Point mode. This is because the USB mode of operation always overrides any other mode of operation.
If the VOCOM’s current configuration is infrastructure mode, then reset the VOCOM by pressing the button on the device to configure it to Access Point mode. Or connect the VOCOM to the computer via USB/ECTA-12 cable and in the VOCOM Configurator application, go to configuration > Access Point > Save Configuration > Restart Device. Then, remove the USB cable. The device will then be in Access Point mode.
There are two ways to set up wireless Access Point mode: either via the Windows notification or by selecting the VOCOM Tough in the VOCOM Configurator application.
Instructions – set up access point mode via the Windows notification
Figure: VOCOM Tough in access point mode
Diagnostic connector
ECTA-26/OBD cable
VOCOM Tough
VOCOM’s Wi-Fi network
USB adapter
Windows computer
Internet access
Router
Internet/Central System
Connect the wireless USB adapter to the USB port of your computer.
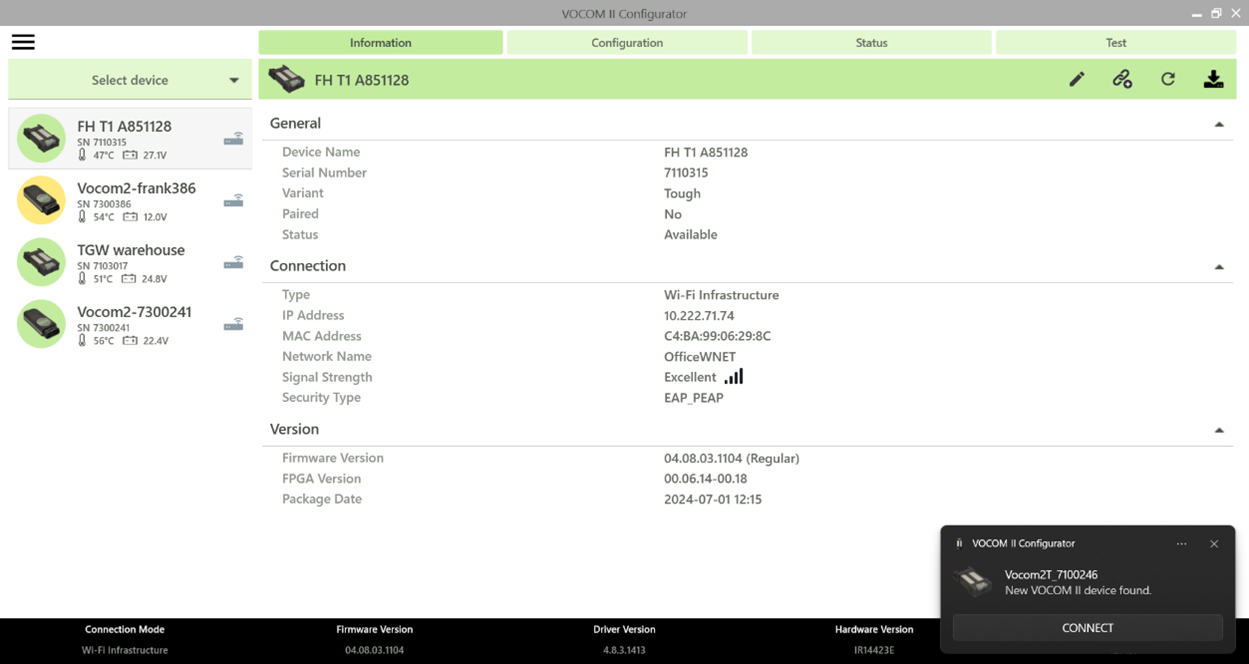
Connect the VOCOM Tough to the OBD connector in the vehicle. After the VOCOM Tough has powered up (which normally takes less than 30 seconds), a VOCOM notification is displayed on your computer. If no notification appears, see No VOCOM notification appeared during the first time setup.
Click on the “CONNECT” button in the VOCOM notification.
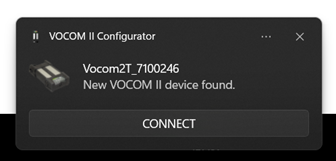
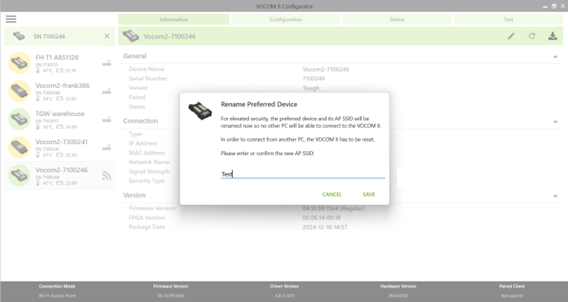
Rename the preferred device so that only your computer can identify the device in the future. Click on the “SAVE” button.
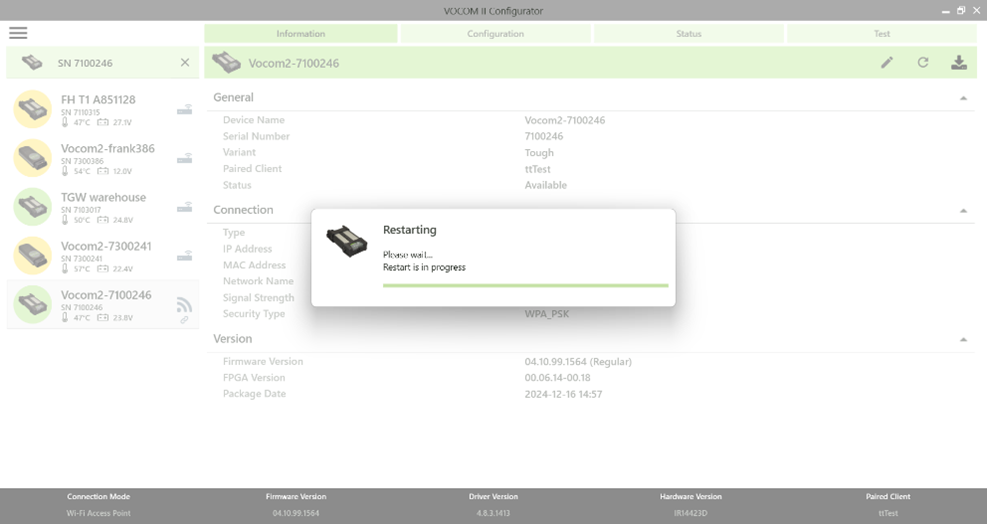
After clicking on save, the device will restart. Please wait until the device is restarted.
The VOCOM Tough is now paired to your computer. Next time you plug the device into a vehicle, it will connect automatically. You will get a notification every time the device is connected. To turn off the notification, see Turn off the VOCOM notification.
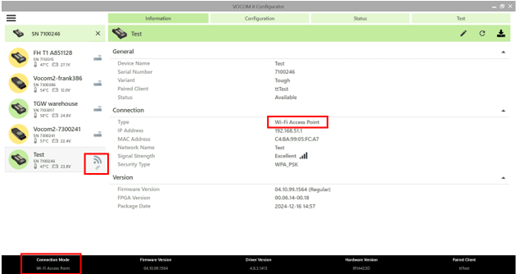
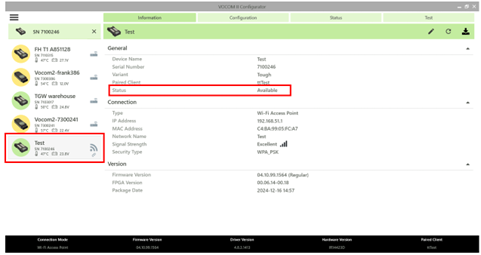
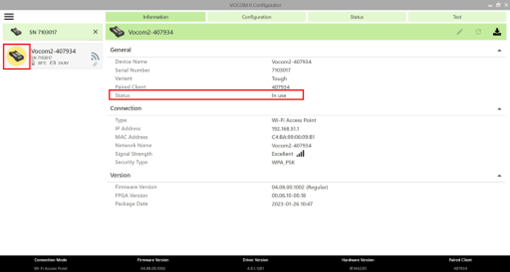
Also, look for the information in the configurator application indicating that the device is configured in access point mode.
Look for indicators marked in red in the image below that show a successful pairing.
Instructions – set up Access Point mode via Configurator
Connect the wireless USB adapter to the USB port of your computer. Connect the VOCOM Tough to the OBD connector in the vehicle.
Open the VOCOM Configurator application. Select your device in the VOCOM Configurator by clicking on the “Select device” dropdown button.
After selecting your device, rename the preferred device. This is recommended for easy identification of the VOCOM device by only your computer in the future.
After clicking on save, the device will restart. Please wait until the device is restarted.
The VOCOM Tough is now paired to your computer. Next time you plug the device into a vehicle, it will connect automatically.
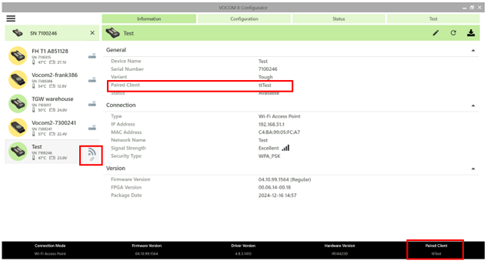
Look for the information in the configurator application indicating that the device is configured in access point mode.
Also, look for indicators marked in red in the image below that show a successful pairing.
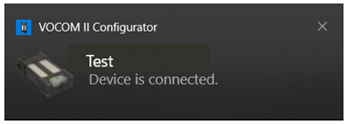
That’s it! The VOCOM Tough is now configured for your computer, using Access Point mode. Now, you can start using your VOCOM device.
The device status is set to “Available” when the device is successfully paired with a computer but is not being used by Tech Tool or any other application. The device status is set to “In use” when any application like Tech Tool is using the VOCOM device.
Figure: VOCOM Tough is idle/available
Figure: VOCOM Tough is in use
Connecting to the Internet network
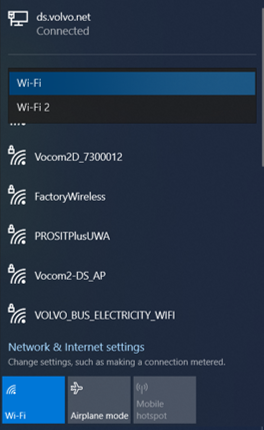
The computer will automatically select the available Wi-Fi adapters (Wi-Fi or Wi-Fi 2).
If you wish to know which Wi-Fi adapter is connected to what device, click on the network icon in the toolbar of your computer and you can see the information there. Generally, the computer’s inbuilt Wi-Fi adapter (Wi-Fi) will be connected to the internet network router, while the USB adapter (Wi-Fi 2) will be connected to the VOCOM device. However, the vice versa also holds true.
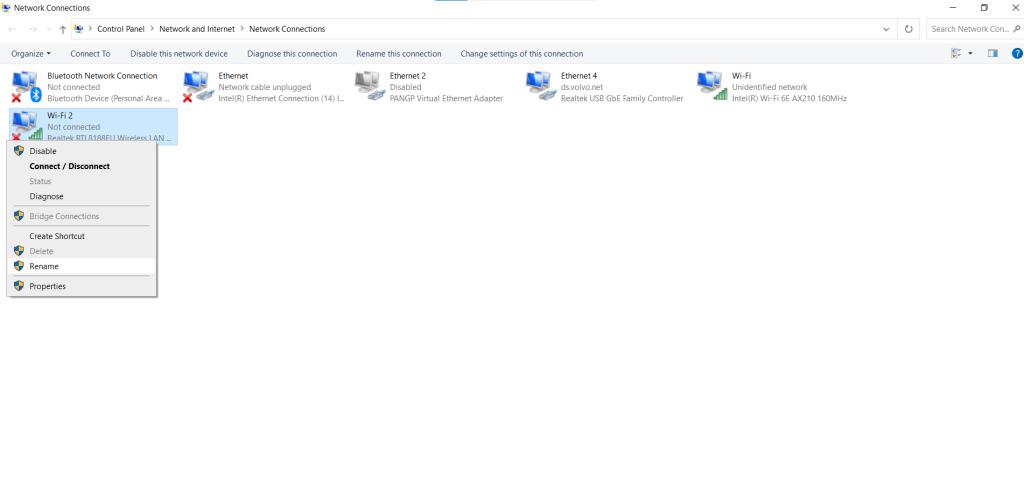
The user is recommended to rename the “Wi-Fi 2” adapter name to “VOCOM” which is easier to identify in the future by opening Control Panel > Network and Internet > Network Connections. Right-click on Wi-Fi 2 and select “Rename” to rename the adapter.