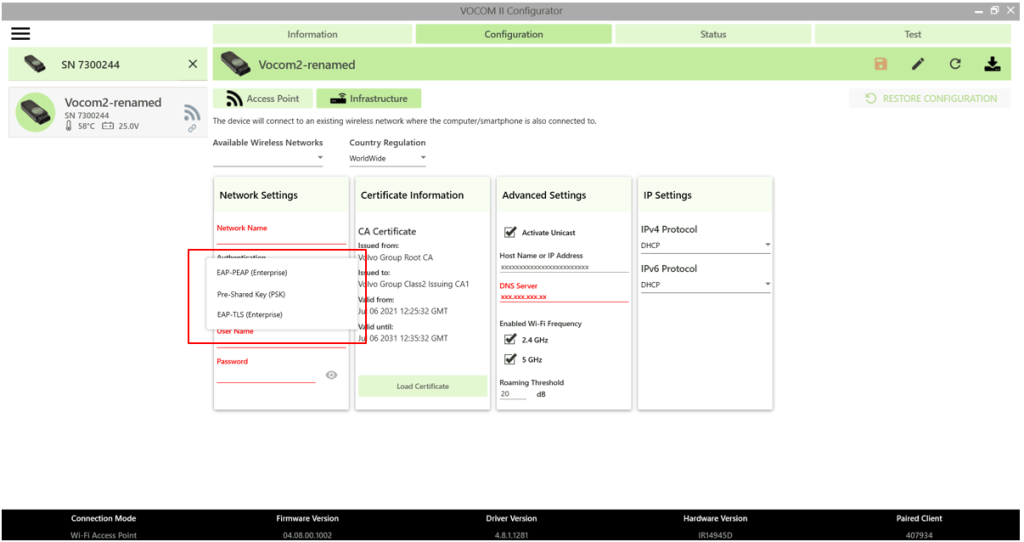
Figure: Three authentication methods supported by VOCOM II configurator
When operating in WLAN-Infrastructure mode, VOCOM II is connected to a wireless infrastructure.
A wireless infrastructure is determined by the network name (SSID), authentication type and encryption type. A wireless infrastructure comprises one or more Access Points with the same SSID spanning the wireless network.
VOCOM II Configurator supports three methods of authentication:
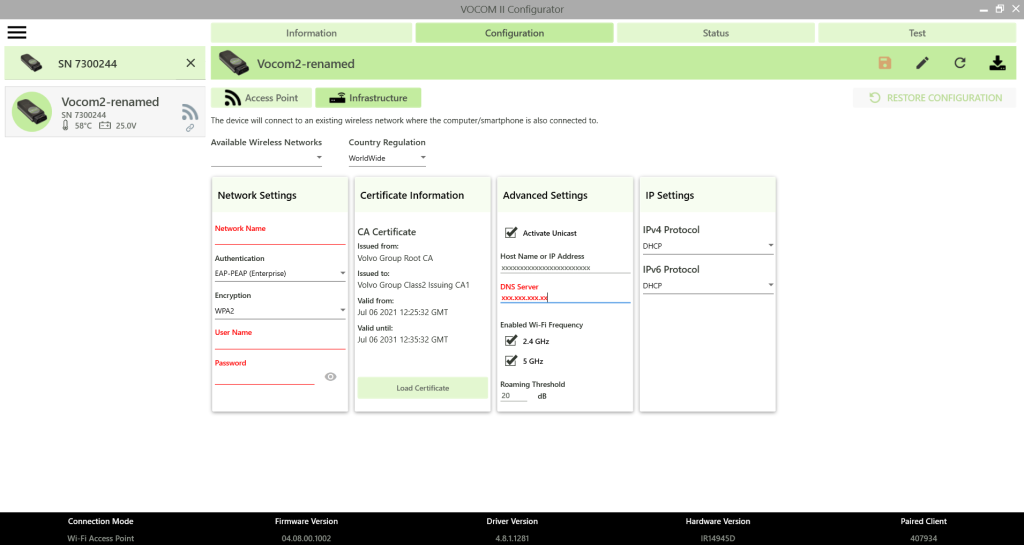
EAP-PEAP uses a certificate-based authentication. This method uses server/root certificates to authenticate the Access Points of a wireless network at the wireless clients and a client-specific user name/password to authenticate the wireless client at the wireless network.
Note: When using WPA-Enterprise authentication, a certificate has to be installed on VOCOM II. This certificate has to be obtained in advance from the company’s IT department.
To configure the VOCOM II device for EAP-PEAP (Enterprise):
Open the configurator application.
Configuration tab > Infrastructure.
Choose an available wireless network.
Authentication shall be set to EAP-PEAP (Enterprise).
Select an encryption.
Enter the user login credentials (Username and Password).
Click on “Load Certificate” to load a CA certificate. This will open another window where you can select the company provided certificate and load it.
Click the Save button to confirm the configuration.
Click the Restart button to apply the configuration.
Pre-Shared Key (PSK)
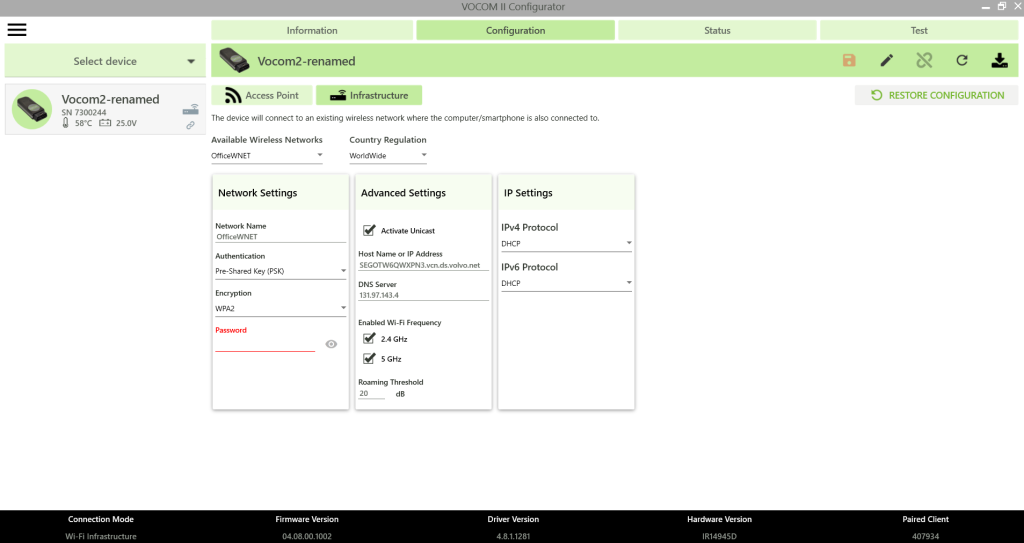
Figure: PSK authentication method
Pre-Shared Key or PSK is the most common and simple network configuration where the network is protected by a password (router passwords) for authentication. This method is typically used in home networks and small offices.
To configure the VOCOM II device for PSK is fairly simple. All you need is to have the device connected to your computer either through the USB cable or through the VOCOM II access point.
Open the VOCOM II Configurator application.
Note! If you cannot see your VOCOM II device check our troubleshooting guide.
Go to Configuration tab > Infrastructure.
Select the network from the list of Available Wireless Networks.
If you are connected to the VOCOM II access point, then the application will not list the available networks, hence enter the network name manually in the “Network Name” field.
Authentication shall be set to Pre-Shared Key (PSK).
Encryption WPA2 is selected by default and should work in most cases but you can change to WPA + WPA2 if you still use old WPA encryption standard.
Note! WEP is not supported by VOCOM II due to cyber security policy.
Enter the pre-shared key, i.e. the network password on the Password field.
Click the Save button to confirm the configuration.
Click the Restart button to apply the configuration.
At this point you can remove the USB or change the computer Wi-Fi connection, in case you were connected to the VOCOM II access point.
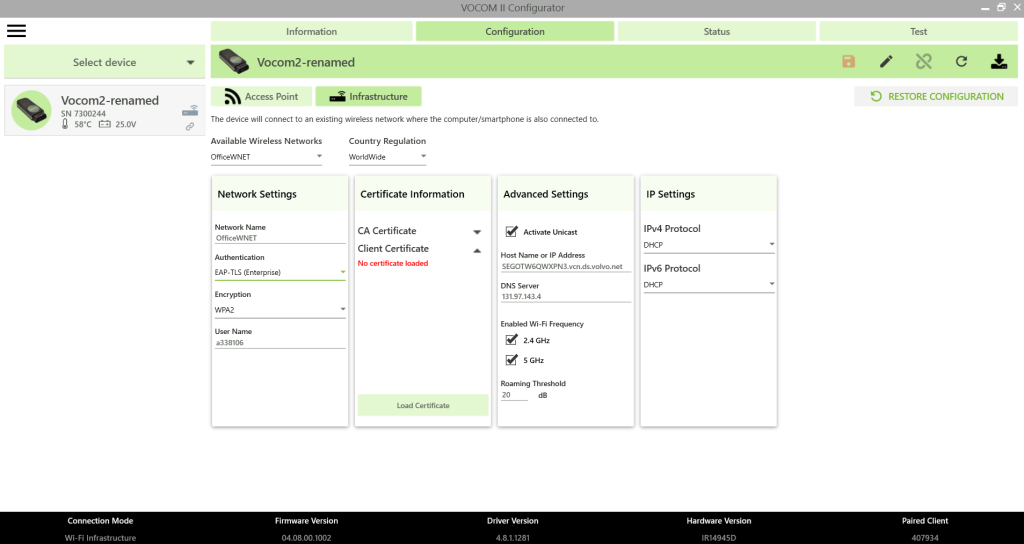
EAP-TLS (Enterprise)
Figure: EAP-TLS authentication method
The steps for EAP-TLS authentication is very similar to EAP-PEAP authentication. The only difference is in EAP-TLS method, the user needs to load a Client certificate in addition to a CA certificate.
Make sure that you have the client certificate available. This is issued by your company’s IT department required for EAP-TLS authentication. VOCOM II supports client certificates in PKCS 12 format (with file extension .P12 or .PFX).
You also need to have the certificate-specific password and identity available.