Set up Android mode/Wi-Fi Direct access point mode (Android)
Overview


- Diagnostic connector
- VOCOM II Mini
- VOCOM’s Wi-Fi network
- Android device
- Internet access
- Router/4G network
- Internet/Central System
- The VOCOM II Mini device is connected to the vehicle/equipment’s OBD port/Diagnostic connector. The connection between the VOCOM II Mini and the Android device is wireless.
The set up
Android mode enables your VOCOM II Mini to connect to an Android device and at the same time be able to connect to the internet using the mobile network.
Step 1: Use the device button on the VOCOM II Mini to configure the device into Android mode.
- Note: This option is applicable for Mini devices with firmware version 4.08 and above.
- Press and hold the device button on the VOCOM II Mini until you hear three short beeps. Release the button immediately after. Now the VOCOM II Mini is in Android mode. You can see the blue light blinking now.
Step 2: Once the VOCOM II Mini device is set to Android mode, open the Diagnostic Suite application on the Android device and select the desired tool in the application.
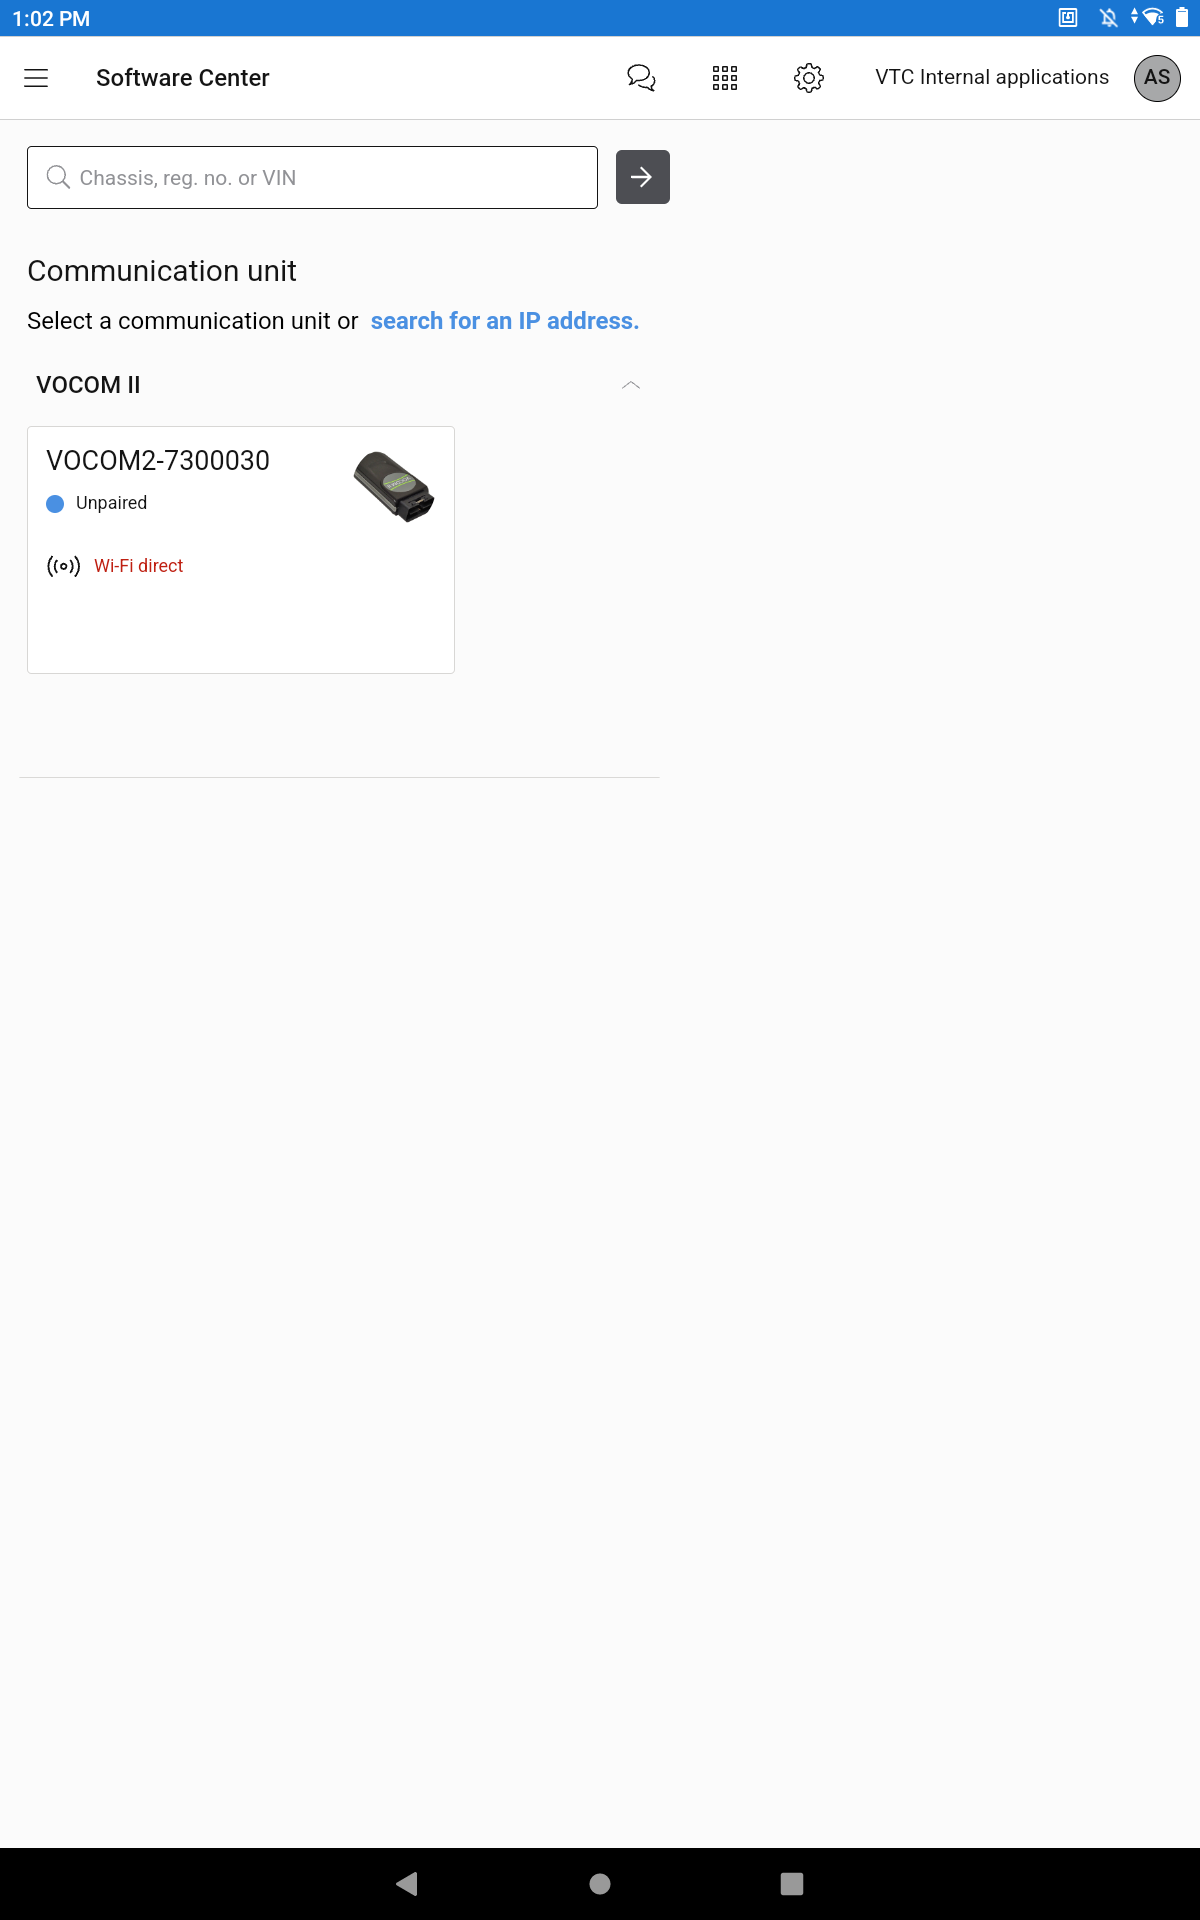
- The VOCOMs configured in Android mode will appear on the screen as below.
- Note: The VOCOM device will be listed as “Unpaired”.

Step 3: Select the desired VOCOM device from the list.
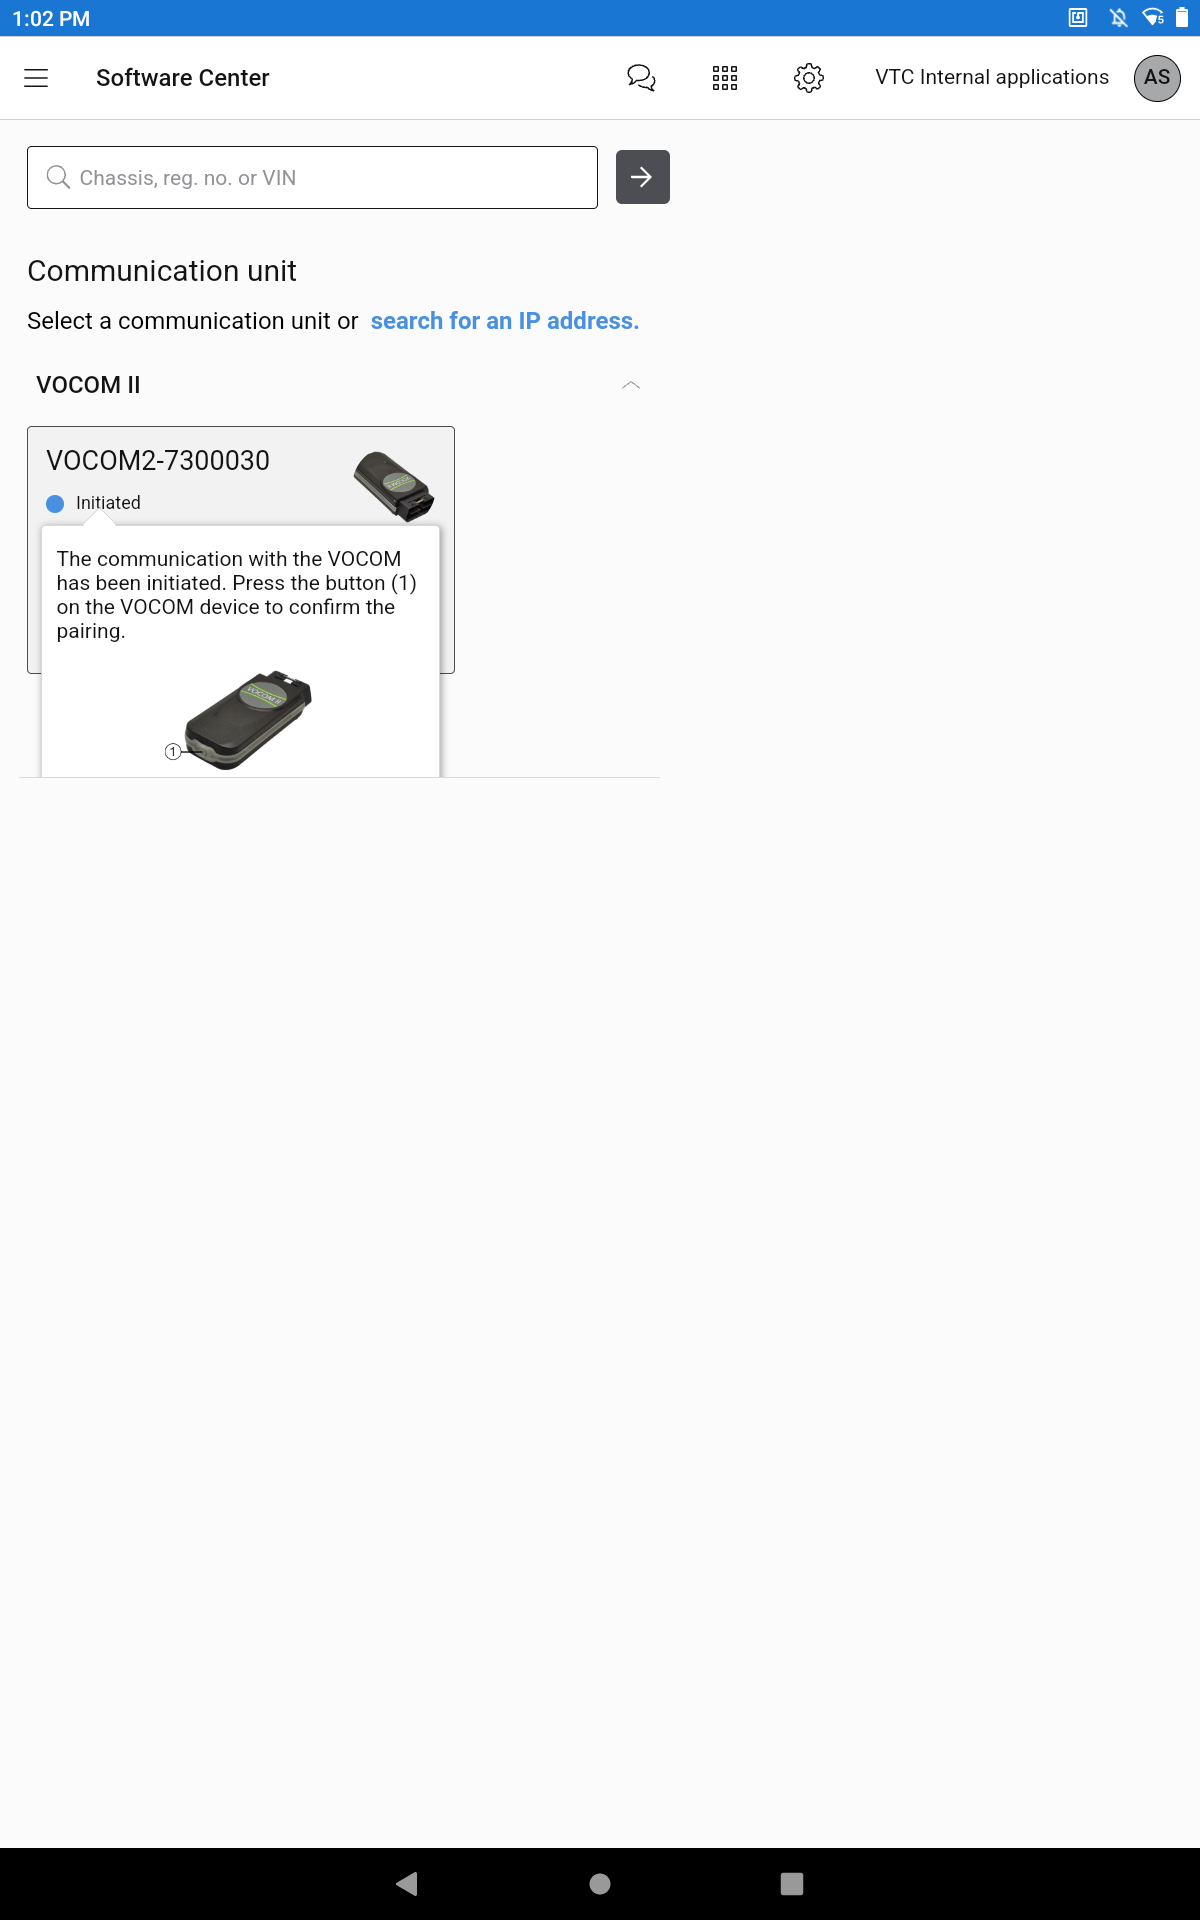
- Send an invitation to the VOCOM II Mini device by selecting the VOCOM device. The status will now change to “Initiated”. The Android device is now waiting for confirmation from the VOCOM II Mini device.

Step 4: Confirm the pairing.
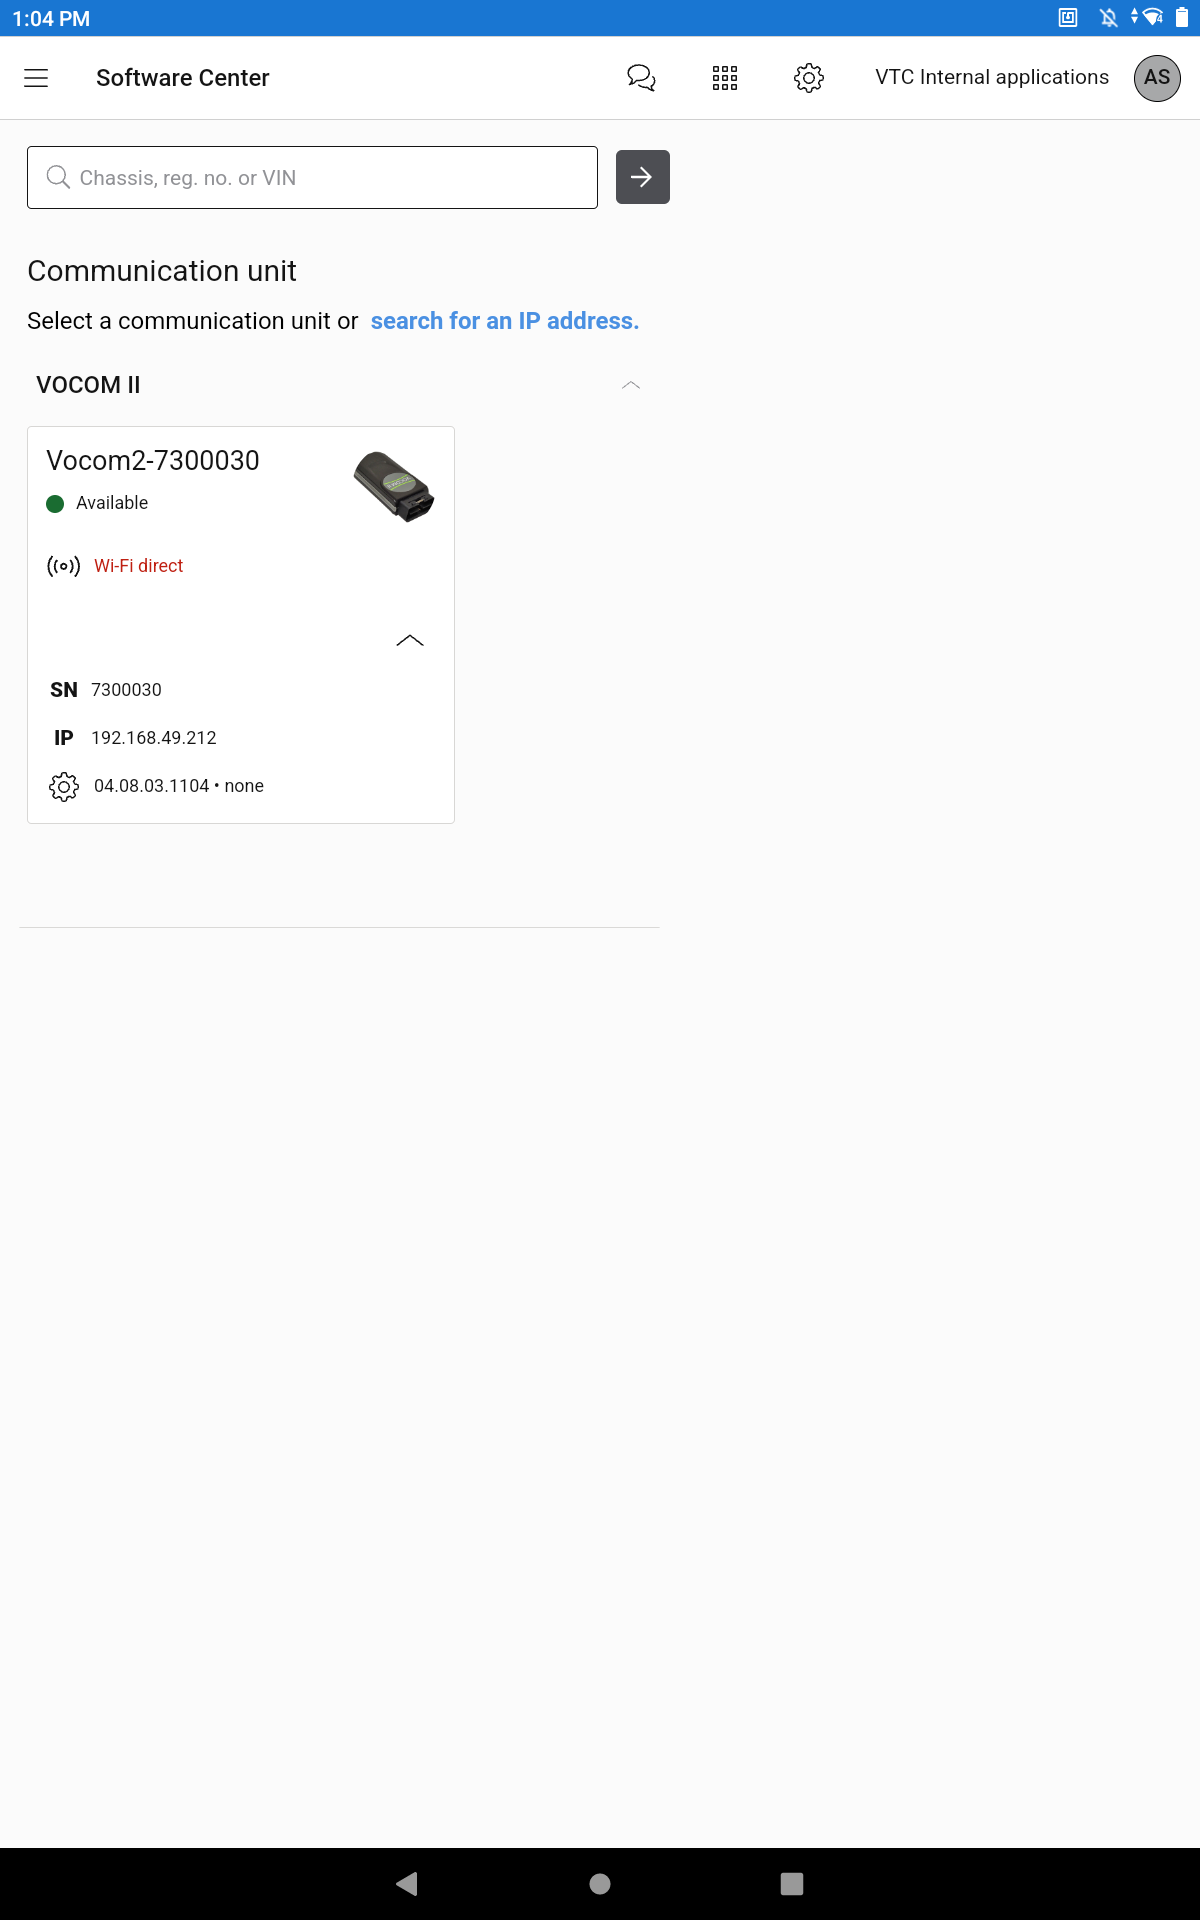
- Push the device button once, you shall hear one short beep. This will confirm the pairing. The status on the Android device will show “Available” as below.
- NOTE: When the pairing is established successfully, a stable blue light will be seen on the VOCOM II Mini device.

Step 5: Connect to the vehicle
- Select the VOCOM device that says “Available”.
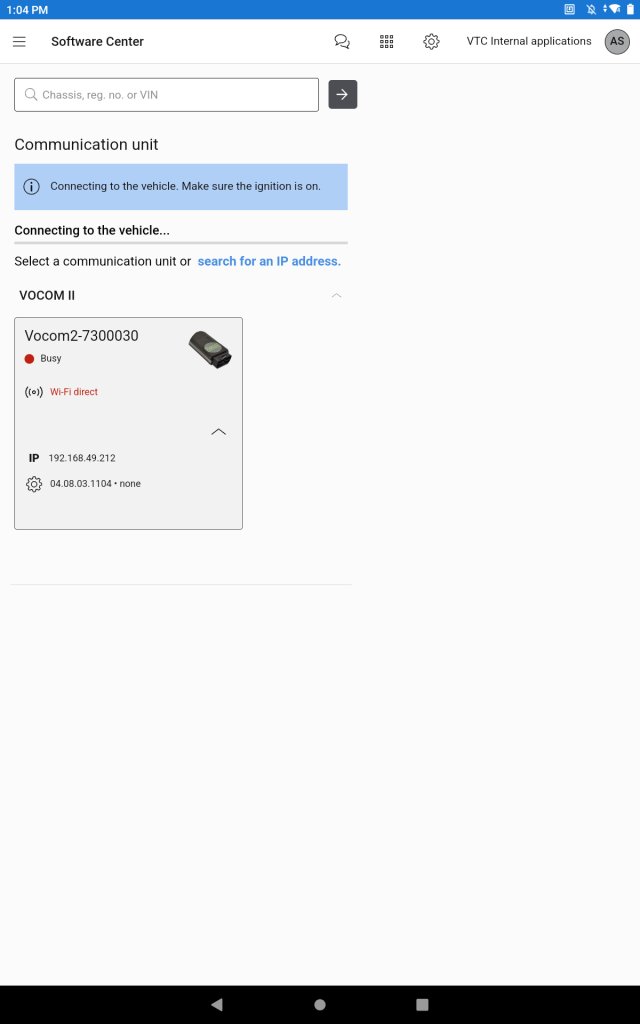
- The VOCOM will appear as “Busy” and will start connecting to the vehicle.


